
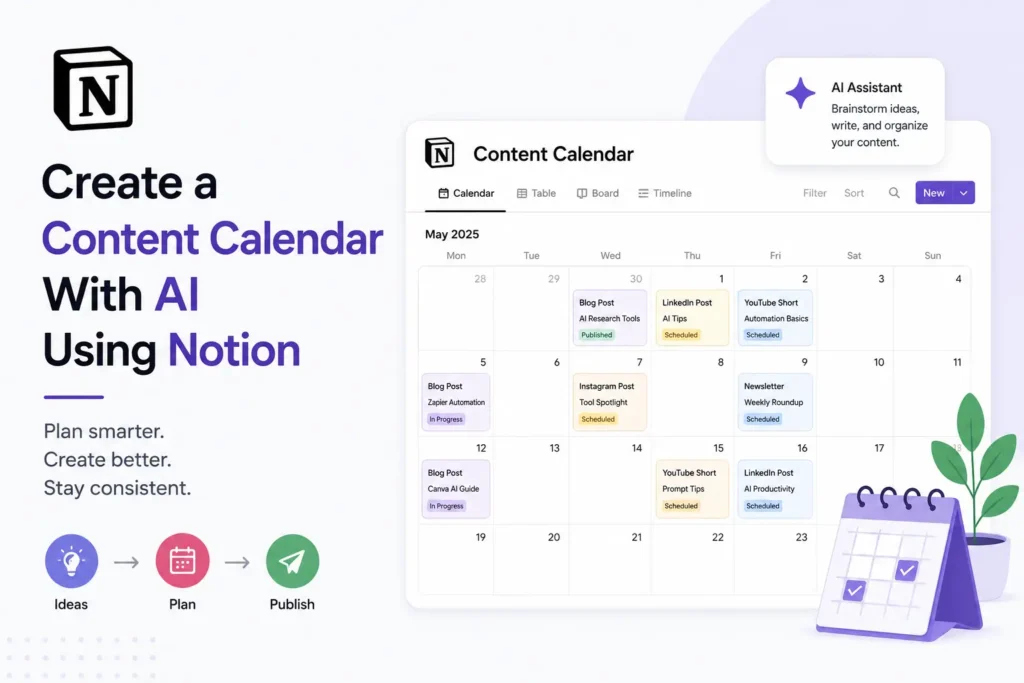
Most content calendars fail before the first post is published.
They become too detailed, too hard to update, or too disconnected from real business goals. A calendar filled with random post ideas may look organised, but it does not automatically create useful content.
A better content calendar helps you answer simple questions:
- What are we publishing?
- Who is it for?
- Why does it matter?
- Which platform is it for?
- Who owns the task?
- What needs to happen before it goes live?
AI can make the planning process faster. It can help you brainstorm topics, group ideas into themes, draft content briefs, write rough captions, and identify gaps in your publishing schedule.
But AI should not decide your entire content strategy.
You still need to understand your audience, choose useful topics, review every idea, and make sure the content supports a real goal.
This guide explains how to create a content calendar with AI using Notion, while keeping the system simple enough to use every week.
Start With a Content Goal Before Creating a Calendar
Do not begin with:
I need to post more content.
That goal is too vague.
Start by deciding what your content should help you achieve.
For example, your content may be designed to:
- Build trust with potential customers
- Bring visitors to your website
- Generate leads
- Support product launches
- Educate existing customers
- Grow a personal brand
- Increase newsletter subscriptions
- Help sales conversations
- Build authority in a niche
A useful content calendar is connected to a real outcome.
Use this sentence before you plan anything:
Our content helps [audience] understand [topic or problem] so they can [take action or reach a result].
For example:
Our content helps small business owners understand practical AI tools so they can save time and improve their workflow.
This gives your calendar direction.
Decide Which Content Types You Will Create
Do not try to publish every type of content at once.
Choose a small number of formats that your team can actually maintain.
For example, you may focus on:
- Blog posts
- LinkedIn posts
- Instagram carousels
- Short videos
- Email newsletters
- YouTube videos
- Product updates
- Case studies
- Customer stories
A small team may begin with one blog post, two social posts, and one short video each week.
That is usually better than planning daily posts for every platform and stopping after two weeks.
Create a Simple Content Calendar Database in Notion
Open Notion and create a new database.
You can start with a table view because it is easy to understand. Later, you can add calendar, board, and timeline views.
Your first database should include only the information you need.
Create these properties:
| Property | Purpose |
|---|---|
| Content Title | The working title or topic |
| Content Type | Blog, social post, video, email, carousel, or other format |
| Platform | Website, LinkedIn, Instagram, YouTube, email, and more |
| Status | Idea, writing, design, review, scheduled, published |
| Publish Date | Planned publishing date |
| Owner | Person responsible for the content |
| Main Goal | Traffic, awareness, leads, education, or engagement |
| Target Audience | Who the content is for |
| Main Keyword | Search phrase or topic focus |
| Call to Action | What the audience should do next |
| Notes | Supporting details, links, ideas, or research |
Do not create twenty properties on the first day.
A simple calendar that your team updates is more useful than an advanced system nobody opens.
Create Views That Make the Calendar Easy to Use
One database can have several views.
This helps different people use the same information in the way that makes sense for their work.
Calendar View
Use this view to see what is planned for each day or week.
It helps you notice:
- Busy publishing days
- Empty weeks
- Missed deadlines
- Repeated topics
- Content gaps before launches
Board View
Create a board grouped by status.
For example:
- Ideas
- Planned
- Writing
- Design
- Review
- Scheduled
- Published
This is useful when several people are involved in the content process.
Table View
Use a table when you need to sort and filter content.
You can filter by:
- Platform
- Content type
- Owner
- Publish month
- Status
- Target audience
Content-Type View
Create a filtered view for each format.
For example:
- Blog posts only
- LinkedIn posts only
- Video content only
- Email content only
This makes it easier to plan one channel without being distracted by everything else.
Step 1: Build Your Content Pillars
Content pillars are the main themes your brand talks about regularly.
They stop your calendar from becoming a random mix of unrelated ideas.
For an AI tools website, content pillars could include:
- AI productivity
- AI content creation
- AI design tools
- AI automation
- AI research tools
- AI tools for students
- AI tools for developers
- AI business workflows
For a fitness coach, content pillars may include:
- Beginner workouts
- Nutrition basics
- Habit building
- Client stories
- Fitness myths
- Training plans
Choose three to five pillars.
That is enough to create variety while keeping the brand focused.
Step 2: Use AI to Generate Topic Ideas
Once you have content pillars, use AI to generate useful topic ideas.
Do not ask:
Give me content ideas.
Instead, give AI clear context.
Use this prompt:
Create 20 content ideas for a [business type].

Target audience:
[describe the audience]

Main content pillars:
[list your pillars]

Goal:
[traffic, leads, awareness, education, engagement]

Content formats:
[list the formats you use]

Avoid generic topics.
Include practical how-to ideas, common mistakes, beginner questions, comparison topics, and workflow-based content.
For example:
Create 20 content ideas for an AI tools website.

Target audience:
Freelancers, creators, students, and small business owners.

Main content pillars:
AI productivity, AI content creation, AI research, AI automation.

Goal:
Grow organic traffic and help readers choose useful tools.

Content formats:
Blog posts, LinkedIn posts, short videos, and email newsletters.

Avoid generic topics.
Include practical how-to ideas, common mistakes, beginner questions, comparison topics, and workflow-based content.
Do not add every idea to your calendar.
Choose topics that match your audience and business goals.
Step 3: Turn Ideas Into Useful Content Briefs
A title alone is not enough.
Each content item should have a small brief that explains what the post needs to achieve.
Create a Notion page inside each calendar entry.
Add these sections:
- Audience
- Problem to solve
- Main idea
- Target keyword
- Key points
- Related tools or products
- Internal links
- External sources
- Call to action
- Notes for design
- Publishing checklist
This makes content easier to create because the writer, designer, and reviewer all understand the purpose.
Prompt for Creating a Content Brief
Create a concise content brief for this topic:

[insert topic]

Audience:
[insert audience]

Goal:
[insert goal]

Include:
- Search intent
- Main problem the reader has
- Suggested outline
- Important questions to answer
- Internal-link opportunities
- Suggested call to action
- Common mistakes to avoid

Keep the brief practical and avoid unsupported claims.
Use the result as a draft, then edit it based on your real expertise and research.
Step 4: Use Notion AI to Organize Content Ideas
A content calendar becomes difficult when you have too many ideas and no system for choosing them.
Notion AI can help you sort ideas by theme, platform, audience, or stage in the content process.
For example, you can collect fifty ideas in one database, then ask AI to help identify:
- Beginner-friendly topics
- Topics for business owners
- Topics suitable for short videos
- Topics with strong search intent
- Topics that need research first
- Topics that can become a blog series
- Ideas connected to your existing posts
This helps you avoid publishing several similar topics in the same week.
For AI research and source-checking workflows, connect this article internally to How to Research a Topic With AI Using NotebookLM.
Step 5: Plan Content in Weekly Themes
Planning one month of unrelated content can feel overwhelming.
A simpler approach is to create weekly themes.
For example:
Week One: AI Research
- Blog: How to Research a Topic With AI Using NotebookLM
- LinkedIn post: Three mistakes people make when researching with AI
- Short video: How to check AI citations properly
- Email: A simple AI research workflow
Week Two: AI Automation
- Blog: How to Automate Repetitive Tasks With AI Using Zapier
- LinkedIn post: One repetitive task your business should automate
- Short video: Trigger, action, and approval explained
- Email: A beginner automation checklist
Week Three: AI Content Creation
- Blog: How to Create Social Media Posts With AI Using Canva
- Instagram carousel: Five content-planning mistakes
- Short video: One idea into five social posts
- Email: A simple weekly content workflow
Weekly themes help your content feel connected.
They also make internal linking easier because related articles naturally support each other.
Step 6: Add Statuses and Deadlines
A calendar should show progress, not only publish dates.
Use simple statuses such as:
- Idea
- Planned
- Researching
- Writing
- Editing
- Design
- Review
- Scheduled
- Published
Every content item should have an owner and a due date.
For example:
| Task | Owner | Due Date |
| Research topic | Writer | Monday |
| Draft article | Writer | Wednesday |
| Create cover image | Designer | Thursday |
| Review content | Editor | Friday |
| Schedule publication | Marketing | Friday |
This prevents content from staying in the “idea” stage forever.
Step 7: Use AI to Repurpose One Topic
One strong topic can become several useful pieces of content.
For example, take this blog topic:
How to Automate Repetitive Tasks With AI Using Zapier
You can turn it into:
- A LinkedIn post about simple automation ideas
- An Instagram carousel about trigger and action workflows
- A YouTube Short showing one automation example
- An email newsletter about saving time with AI
- A checklist download for small businesses
- A comparison post about Zapier versus other automation tools
Use AI to adapt the message for each format.
But do not copy the same wording everywhere.
Each platform needs a slightly different structure, tone, and call to action.
For social-media workflow ideas, link internally to How to Create Social Media Posts With AI Using Canva.
Step 8: Build a Realistic Publishing Schedule
Do not create a calendar based on what you wish you could publish.
Create one based on your available time, skills, and team capacity.
A realistic solo-creator schedule may look like this:
- One blog post each week
- Two LinkedIn posts each week
- Two short videos each week
- One email newsletter every two weeks
A small team may publish more often, but only if every piece still receives research, editing, and review.
Consistency is not about posting every day.
It is about publishing content your audience can trust on a schedule you can maintain.
Step 9: Add a Review Checklist Before Publishing
Every content item should have a final checklist.
Create a simple template in Notion.
Before marking content as published, check:
- The title is clear.
- The content has one main purpose.
- The information is accurate.
- Sources have been checked.
- The tone matches the brand.
- The design is easy to read.
- Links work.
- The call to action is relevant.
- The content works on mobile.
- The publish date is correct.
This helps reduce avoidable mistakes.
It also gives team members a shared definition of “ready to publish.”
Step 10: Review What Performs Well
A content calendar should not only track what you plan.
It should help you learn what works.
After content is published, add simple performance notes.
Track:
- Page views
- Clicks
- Saves
- Shares
- Comments
- Leads
- Email sign-ups
- Video watch time
- Search impressions
- Rankings for important keywords
You do not need to track every metric for every post.
Choose the numbers connected to your goal.
For example, a how-to blog may be measured by search traffic and newsletter sign-ups.
A LinkedIn post may be measured by comments, profile visits, and enquiries.
Use the results to improve future content planning.
Common Mistakes When Creating a Content Calendar With AI
Planning Too Much Content
A packed calendar may look productive, but it often creates rushed, low-quality work.
Start with fewer content pieces.
Letting AI Choose Every Topic
AI can suggest ideas, but it does not fully understand your audience, customers, or business priorities.
Use human judgment.
Creating Random Content Pillars
Your pillars should connect with your products, services, expertise, or audience needs.
Do not create topics only because they seem popular.
Ignoring Content Reuse
One good topic can become a blog, carousel, video, newsletter, and social post.
Use your best ideas more than once.
Forgetting Deadlines and Ownership
A content idea without a person and due date is often just a note.
Add owners and deadlines.
Measuring Nothing
Without performance notes, you cannot learn which content deserves more attention.
Review results every month.
A Simple Weekly Notion Content Workflow
Use this workflow each week:
- Review your content pillars.
- Add new topic ideas to the database.
- Choose one main topic for the week.
- Create a short content brief.
- Add research links and notes.
- Draft the main content item.
- Repurpose the idea for other platforms.
- Review content before publishing.
- Schedule the content.
- Add results after publication.
This system works for freelancers, creators, small businesses, agencies, and marketing teams.
Final Checklist
Before relying on your content calendar, make sure:
- Your calendar has one clear goal.
- You use a small number of content pillars.
- Each content item has an owner.
- Every item has a status.
- You have realistic deadlines.
- AI ideas are reviewed by a person.
- You include research where needed.
- Your publishing plan matches your available time.
- You reuse strong topics across platforms.
- You track simple performance results.
Final Verdict
A content calendar with AI should make publishing easier, not more complicated.
Notion gives you one place to plan ideas, organize deadlines, create briefs, track progress, and review results. AI can make brainstorming and early drafts faster, but your strategy and judgment still decide what deserves to be published.
Start with a simple database, a few content pillars, and a realistic weekly schedule. Then improve the system as your content library grows.


